Showing posts with label Comfort Food. Show all posts

Tuesday, April 17, 2012

Mummy's Banana Bread


Good lord- has the early spring been crazy busy for everyone else, or is it just me??? They say that life with a baby can move at warp speed, but I really didn't think time could go by quite as quickly as it has been in the last few months- wow! 


Just a quick update on our boy- Will is on the cusp of the nine month mark, and he continues to grow and amaze us every day. Having mastered crawling, he is on the move all the time these days, and I wouldn't be surprised if walking isn't too far away, since he lives to pull himself up on various items and use them to work on his stepping skills. 


This baby update isn't just a shameless bragfest about my little fella, since as Will continues to grow and change, he has become a more adventurous eater (not surprising, given his genetic disposition!). As a result, I find myself with a renewed sense of motivation in the kitchen, and a I've started testing out various recipes with him to see what he's into. This new rebirth of my culinary endeavors has also been compounded by the fact that we purchased a share in a  CSA (that's Community Supported Agriculture) through Covey Rise Farms started up last week, so I have been working to find new ways to bring out the wonderful produce we're getting from the program. We found out about the farm from their partner, Covey Rise Lodge, a fantastic hunter's paradise that my father-in-law discovered on a visit, and a place we keep going back to for a fun afternoon of clay shooting. So, be on the lookout in the future for posts highlighting our amazing CSA produce (as well as the stuff we're growing here in our backyard- check out The Humble Home), I'm really excited to see what the season brings! 


One thing I've found that Will adores so far is my mother's banana bread recipe. I have long loved this wonderfully tasty bread, and you can imagine how thrilled I was to find out that Will was just as enthusiastic about it. It's a great way to use up bananas that have gone a little past peak, and the addition of Grapenuts gives the bread a wonderful texture and body with a subtle brightness from the lemon zest. The original recipe called for just white flour, but I've been subbing in 3/4 cup of whole wheat flour for a little added boost. I usually take the sugar down to about 1/2 a cup as opposed to the 2/3 cup the recipe calls for, but you can adjust to your taste. 


For Will, I make these as mini muffins (omitting the nuts for his share, but adding it in for the 1/2 half), and it makes a perfect pan of 24 minis. They're a great size for him, and it's easy to throw a couple in a snack bag to take with us on adventures down to the park. Baked off as a loaf, the bread makes for a great hostess gift or contribution to a potluck. The bread also freezes well in either form, and is a sinch to throw together- this morning's batch I just whipped up while the boy was taking his morning snooze. 


Big thanks again to my wonderful Mummy for this family favorite that has already made a friend in the newest generation of foodies!


Mummy's Banana Bread


- 1/3 Cup butter, softened
- 1/2-2/3 Cup sugar
- 3/4 Tspn lemon zest
-  1 Egg, beaten
- 1 3/4 Cups flour (I use 1 c. white a 3/4 cup whole wheat)
- 2 Tspn baking powder
- 1/4 Tspn baking soda
- 1/2 Tspn salt
- 1 Cup mashed banana
- 1/2 Cup chopped walnuts (optional)
- 1/2 Cup dried cranberries
- 1/2 Cup Grapenuts
* about 1/2 Cup milk


Preheat oven to 350. Cream together butter and sugar, add in lemon zest and egg. Sift dry ingredients together and stir into wet. Add in bananas and mix well. Add in nuts, cranberries and Grapenuts and mix well. Thin dough slightly with milk, until consistency is smooth, but still thick. Spoon into mini muffin or bread pan. Bake muffins for 30 mins, and bread for about 1 hour, or until a toothpick inserted in the middle comes out clean. 

Monday, November 7, 2011

Creole Red Beans & Rice

That's a big ol' pot of love, folks

Well, try my hardest, I didn't quite make my goal of getting a post up this weekend, alas! In part, I actually blame this recipe for my delay, since I was doing my best to take down an entire pot of this tasty Louisiana treat before the week- another goal I didn't quite get to. But I digress. Since moving down here and getting settled, I've been really excited to sample all the local flavors and start working on my own versions of them. So far, my favorite two have been red beans & rice and shrimp po'boys, both of which I have been tinkering with in the new Humble Kitchen (look for a Roasted Shrimp Po' Boy to be appearing soon!). 

Much like a lot of the food that I love to cook and share, this Louisiana staple has its roots in necessity. Beans (either dried or tinned) are a very inexpensive staple, as is plain and simple rice. Naturally, red beans & rice is a great go-to dish that is wildly satisfying to the soul, and also a comfort to the wallet. Since I am now a stay at home mama, I am not only charged with taking care of our little love, but also taking care of my big love and making sure that they are both well-fed. The babe is pretty easy, so most of my food focus is on keeping Kyle and I well fed on a very tight budget. So after a little research (mostly on Epicurious and Food Network as well as the back of the bag of small red beans I purchased!) I started to piece together my recipe from what I had on hand, and what I could spend out of my budget. My method for rehydrating the beans was done somewhat out of error (I had meant to soak the beans overnight, but forgot the night before), but I think it still turned out very well, just be sure to start the beans early in the day if you plan on having them that night, or keep it simple and do an overnight soak. 

I've got to take a moment and give a little respect to the guy manning the meat counter at our local Albertson's- not only was he incredibly knowledgeable about their offerings, he had a lot of great suggestions for how to use their various meats & fish offerings-  very inspiring! It's amazing to walk into a run of the mill grocery store and be greeted by such a beautiful meat/fish counter with so many offerings from local sources, truly awesome!

I'm not sure exactly how "authentic" my red beans & rice came out to be, but I feel confident that it was a good representation of the local flavor. It's a great way to stretch your dollar and fill hungry bellies without feeling like you're skimping. 

Red Beans & Rice (pieced together from sources noted above)

-1 lb bag of dried small red beans, picked over & rinsed
- 3/4 lbs fresh cajun sausage (Andouille works very well)
- 3 stalks of celery with leaves, washed & diced small
- 1/2 a sweet onion, diced small
- 3 cloves of garlic, minced fine
- 3 tbspns Creole seasoning (I used a mix of "Slap Ya Mama" and "Cajun Land")
- Louisiana hot sauce (I used Crystal "Extra Hot"), optional
- Sea salt & fresh cracked black pepper
- Olive oil

-1 cup long grain rice, prepared to package instructions

After picking over and rinsing beans well, combine with six cups of water and a hearty sprinkling of salt in a Dutch oven and bring to a boil. Lower temp to just barely simmering, cover almost full with lid (leaving a small opening for steam to escape), and leave beans to fully soften- about 1 1/2 to 2 hours, stirring occasionally. If liquid level drops below beans, add more water accordingly. When beans are fully cooked, mash about half the beans with a potato masher or a large wooden spoon- this will help thicken the liquid and give a great texture to the final product. 

In a large saute pan over medium heat, add sausage and a little water (1/4" or so) and steam until sausage is cooked through (if working with pre-cooked sausage, skip this step). Remove sausage from pan and pour off water. When cool enough to handle, slice sausages into diagonal rounds. Return pan to stove, add a light coating of olive oil and saute sausage rounds until golden brown. Transfer sausage into Dutch oven with beans and stir to combine. Add a little more olive oil to the pan and saute celery and onion (1/2 a green pepper diced up is also a great addition if handy) until softened and onions become translucent but not brown. Add in garlic and continue to cook an additional 2-3 minutes until fragrant. Season vegetables with Creole seasonings to taste, and add into bean & sausage mixture. After combining all elements, check for seasoning and adjust accordingly, adding additional Creole seasoning, salt & pepper and hot sauce if using. Allow mixture to come together over low heat for a couple of hours if possible- the longer, the better!

To serve, ladle beans over servings of cooked white rice, and serve with hot sauce, ice cold beers and big hunks of french bread for sopping up the sauce. 


Monday, April 18, 2011

Shrimp & Grits with Mushrooms, Leeks and Bacon

I am in love with the fact that second trimester has not only been extremely kind to my body, but has also marked the triumphant return of my insatiable appetite! While I have to pace out my eating a little more with smaller meals every couple of hours as opposed to plowing through a couple of giant sittings, I am thrilled to be enjoying pretty much all of the things that I love that caused for some rumblings early on in the pregnancy.

Our impending move South now only a matter of months away (five actually, woah!) combined with the slow arrival of more spring-like weather has me craving seafood. What better way to satisfy my cure something from the briny deep and prepare for Southern living than to try my hand at Shrimp & Grits! After cautiously easing into the Southern staple a few postings ago, I felt confident to take it on again.

When we first moved to town and I was on the hunt for a job, I decided to volunteer my time at the library of a local yacht school in an effort to meet some people and do something positive with my idle hands. Although I no longer volunteer there, I met Jill, one of my favorite people in Newport. About once a week after our shifts at the library we would wander down to The Pier, a restaurant just behind the library and enjoy their ½ price happy hour appetizers and drinks. It was always a great excuse to relax and gossip (as if we hadn’t already done that enough!), and we would occasionally drag our husbands along with us. Being a creature of habit, I would almost always order their Shrimp & Grits, and this recipe is based off of The Pier’s take on this classic dish. So while I am not yet immersed in the Southern culture, I feel myself getting more and more excited to enjoy all of the flavors that Louisiana has to offer, and to taste this classic comfort food as prepared by the folks that put it on the map!

It’s a pretty simple dish to pull together, and I recommend frying off your bacon first while you cook the grits (as I mentioned in my last post about grits, they’re pretty resilient and can hang out on a very low burner for a while), then putting together your mushroom & leek sauté and finishing up with the shrimp to ensure that they don’t overcook. This recipe could easily serve four for dinner with a big green salad and a crisp white wine- I made it for just the two of us, and we had the second half the next night.


Shrimp & Grits with Mushrooms, Leek and Bacon (as inspired by The Pier)

For the Grits:

Depending on the type of grits you are using, follow package instructions for four servings, or use my directions posted here, omitting the ricotta, parmesan and nutmeg. Once grits are fully cooked, stir in 1 tbspn butter, and slowly add in a generous ¼ cup freshly shredded sharp cheddar cheese. Season well with salt & pepper and set aside, covered over very low heat.

For the Shrimp:

- 1 lb. 16-20 count fresh, wild caught shrimp with tail on
- 4-5 Slices thick cut bacon, diced
- 1 Leek (medium size), sliced thinly and cleaned (see my note on cleaning here)
- ½ Package of Baby Bella mushrooms, sliced
- 1 Large clove garlic, minced
- ¼ (ish) Cup seafood or chicken stock
- Handful of flat leaf Italian parsley, chopped
- Sea salt
- Cracked black pepper
- Seafood seasoning (think Old Bay)
- 1-2 Tbspn butter
- Extra Virgin olive oil
- ½ Lemon, cut into wedges
- Hot sauce (optional)

Heat a large skillet over medium high heat, add in diced bacon and cook until crisp and fat is rendered. Remove bacon from pan and drain on paper towel. Reserve 1ish tbspn bacon fat in pan, lower heat to medium add in butter and a couple of turns of olive oil. While oil and butter come up to temp, season one side of shrimp lightly with salt, pepper and seafood seasoning. Once pan is heated, add in mushrooms and season lightly with salt & pepper. Saute, stirring until mushrooms begin to release liquid, about 2 minutes. Add in leeks and continue cooking while stirring occasionally until leeks begin to soften, about 4 minutes or so. Once leeks have fully softened, add in garlic and cook just until garlic is aromatic (a minute or two). Push mushroom/leek mixture to the edge of pan (see picture) and place shrimp into pan, seasoned side down. Season exposed side of shrimp with salt, pepper and seafood season and allow shrimp to cook, undisturbed for about 2 minutes or until bottoms just turn pink. Flip shrimp and cook an additional 2 minutes or until just cooked through. Stir shrimp, leeks and mushrooms together, and add in about ¼ cup of seafood stock and parsley. Allow to simmer for a minute or two and reduce.

To plate: Pile grits in the middle of a shallow bowl or dish and top with leek & mushroom mixture, and top with 4-5 shrimp running down the middle. Sprinkle crisp bacon on top and serve right away with lemon wedges and hot sauce on the side. Also pairs great with a light summer beer and a comfortable porch table!

Monday, April 4, 2011

Black Walnut & Chocolate Chip Banana Cupcakes

Mmmmmm…fresh baked cupcakes. Is there really anything better? Ok, how about a good, healthy smear of homemade cream cheese frosting on top? Happiness? Yeah? Me too.

Prior to becoming pregnant, I had a minimal sweet tooth- a cookie here and there, the occasional small serving of ice cream or maybe a little cake on special holidays. Now that I’m encroaching on 3rd trimester, I find myself with ridiculous cravings for sweets- not all the time, but with enough frequency that I find myself wandering over to the kitchen cabinets and seeking out some satisfaction. Rather than pick up a box of store bought cookies or cupcakes, I’m trying to stick with treats I make at home. This way, I have to really think about the craving and decide whether or not it’s something I absolutely have to satisfy, or there is another way to stave off the beast. Home baked treats are also great, since I can pack up the second half of whatever I make and bring it into my office or send it to the ship with my husband, which not only keeps me from eating six cupcakes for dinner, but also wins me some points with the boss. Win-win in my book.

I have had a HUGE craving for cream cheese frosting for quite some time now, and finally caved late last week under the guise that I would be making the cupcakes for my husband who was coming back to port after being out to sea. Funny enough, he was so kind as to inform me over the weekend that he was not a huge cream cheese frosting fan. Whoops- more for me! I am a cream cheese frosting lunatic, and after a little playing with the proportions on the original recipe, I found my frosting nirvana by cutting back the powdered sugar, upping the vanilla and adding just a hint on nutmeg. Bliss!

I’m not sure that these little baked treats would completely qualify as cupcakes per se, as they are really more of a banana bread/muffin/cupcake hybrid, but I could not in good conscious refer to them as muffins after I layered on a heavy dose of cream cheese goodness. So, cupcakes it is! I picked up the base recipes for these insanely easy treats over on allrecipes.com, and tweaked it a bit with things that I had on hand for a really satisfying little treat. These could easily be converted back into the more healthy land of muffins by switching out some of the regular flour for whole wheat, trading the butter for applesauce, omitting the chocolate chips and forgoing the frosting (eek!). I’m sure the day will come when I’m interested in lightening them up, however, this was not that day!


Black Walnut & Chocolate Chip Banana Cupcakes with Cream Cheese Frosting
(original recipe here)
Makes 12

-1 1/2 Cups all-purpose flour
-1 Tspn baking powder
-1 Tspn baking soda
-1/2 Tspn salt
-3 Large bananas, mashed
-3/4 Cup organic sugar
-1 Large Egg
-1/3 Cup butter, melted
-1/3 Cup black walnuts, roughly chopped
-1/2 Cup dark chocolate chips

Preheat oven to 350 degrees. Line muffin pan(s) with liners. Sift together the flour, baking powder, baking soda, and salt- set aside. Combine bananas, sugar, egg, and melted butter in a large bowl. Fold in flour mixture, and mix lightly. Add in walnuts & chocolate chips and mix lightly until smooth (do not over-mix!) Scoop into muffin pans and transfer to oven. Bake for 25 to 30 minutes. Cakes should spring back when lightly tapped. Remove from oven, take out of muffin pans and let cool on a wire rack.

Cream Cheese Frosting
(original recipe here)
-1 8oz. Package of cream cheese, softened
-1/4 Cup butter (1/2 stick), softened
-3/4 Cups sifted confectioners' sugar
-1 Tspn vanilla extract
-1/2 Tspn fresh grated nutmeg (optional)

In a medium bowl, cream together the cream cheese and butter until creamy. Mix in the vanilla, then gradually stir in the confectioners' sugar and nutmeg.

Once cakes have cooled, coat well with frosting and enjoy!

Monday, March 21, 2011

Seared Duck with Cherry-Onion Port Reduction


Man, I made a promise to myself that I would be better about blogging regularly once I got past the first couple of months of pregnancy, but alas, I dropped the ball. Apologies!


With that mea culpa taken care of, I have been meaning to post this recipe for WEEKS, as it was an absolute smashing success, and I can’t wait for the next excuse to whip it up again. My love affair with duck breast began back in college, when my dear friend Mona first took me to the Galway Bay pub in Annapolis on a random weeknight to hang out with her friend/bartender extraordinaire and sink my teeth into their incredible duck sandwich. From the first bite, I was completely hooked! Years later when Kyle and I moved back to Annapolis, I would find any excuse to sneak over to Galway for one of their perfectly cooked sliced duck sandwiches.

Fast forward to a few months ago when I attended the first ever Supper Club & Wine Pairing co-sponsored by Spark Restaurant and Newport Wine Cellars. I knew my friends & I would be in for an amazing night of food & wine (I did have small samples of each wine to appreciate the pairings, I know- I’m a huge badass) as Spark has always been on my top 10 list in Newport (you can read my review of Spark here), and I have always been intrigued by the offerings that Maria showcases at her lovely little wine shop across from the Viking Hotel. While I could dedicate and entire blog post to this amazing supper club marriage (and probably will), I will say that there was one dish out of the five (!!!) courses that really stuck out as the star to me: the third course Spiced Duck Breast.

I took home a copy of the menu and knew I wanted to work on a re-creation of Sue’s outstanding dish for when Kyle came home after a few weeks up in dry dock in South Carolina. There were certain flavors I was interested in pulling out, and others I wanted to subdue so I started off by scribbling down components and notes to organize my thoughts. By the time Kyle’s homecoming weekend rolled around, I had a plan in hand, and was eager to hit the kitchen!

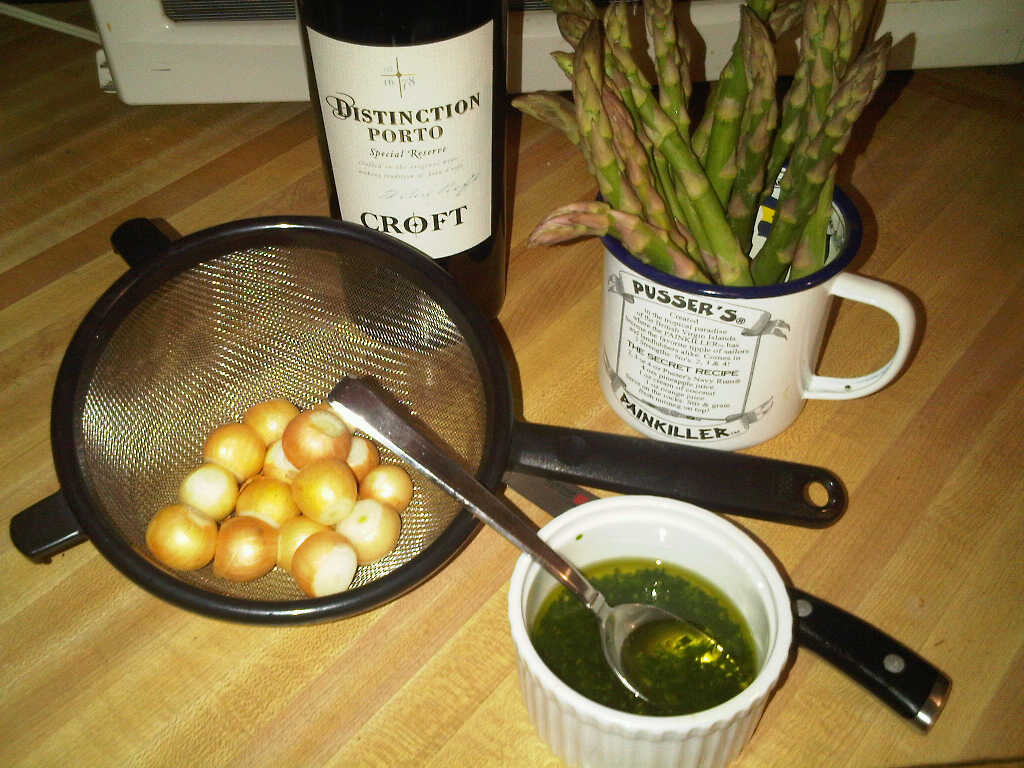
The final result was a beautiful duck dish that hit all of the comforting flavor profiles I look for- rich, warm, a bit rustic, and well-rounded. I will admit that I have not had extensive experience working with duck in my own kitchen, but I really didn’t have any problems since it presents itself much like veal or beef. While this dish has a fair amount of steps and prep time, I think it is well worth the effort and makes for a wildly impressive meal for guests or for your special someone. I served a simple side of roasted asparagus dressed with olive oil, salt, pepper and lemon zest, which rounded out the meal perfectly. I’ve written out the recipe pretty much in the order that I cooked in, starting with the chive oil and finishing with the duck- this gives the chives plenty of time to flavor the oil, and ensures that the duck gets the proper time to rest without waiting for the other components to be ready. As grits are pretty resilient, they are happy to sit on a just warm burner for some time without losing their integrity.

Seared Duck Breast with Pearl Onion & Cherry Port Reduction over Creamy White Grits with Chive-Truffle Oil
(serves two with leftovers)

For the Chive-Truffle Oil:

-1 Large bunch of fresh chives, minced finely (think a good handful
-1 Small bunch of fresh Italian flat leaf parsley, minced finely
-1/4 Cup extra virgin olive oil
-1/4 Cup truffle oil.

Place minced chives and parsley in a ramekin or small dish large enough to hold all components. Add in olive & truffle oil. Using the back of a spoon or muddler, lightly crush herbs to release flavors into oil. Set aside on countertop.


For the Grits:

-2 Cups water
-1 Tblspn salted butter
-1/2 Cup white hominy grits
-2 Heaping tblspns part-skim ricotta
-1/2 Cup fresh shredded parmesan cheese
-Dash of nutmeg
-Sea salt
-White pepper

Bring water and butter to a boil, add in grits. Stirring occasionally, cook grits for approximately 25 minutes or until grits are soft and creamy. Once ready, stir in ricotta cheese until well incorportated over low heat. Add in parmesan cheese in small amounts, stirring well to mix (if added all at once, you risk having a cheese ball in the middle of your grits). Season well with a dash of nutmeg, sea salt & white pepper. If grits seem a bit too stiff, stir in a teaspoon or two of milk or cream to loosen. Once proper consistency is reached, cover & set on a very low burner.


For the Duck:

-2 Duck breast filets with skin on (I used wild Canadian duck, and would highly recommend)
-16-20 Pearl onions, blanched & peeled
-3/4ish Cup of dried cherries
-3/4 to 1 Cup good quality Port
-Extra virgin olive oil
-Sea salt
-Cracked black pepper

Remove duck breasts from packaging, rinse and pat dry. Using a sharp knife, remove any excess fat so you are left with a skin/fat layer that covers the top of the breast. Make 3-4 shallow cuts (through fat only, do not puncture meat) on the top of the skin on each breast. Slice fat trimmings into ribbons and slice again into ¾ inch pieces (for cracklings). Season fat side of duck with salt & pepper.

In a large sauté pan, heat 3-4 tablespoons of olive oil over medium heat until just smoking. Add duck fat pieces and stir frequently to avoid sticking and burning. Once pieces have crisped (think bacon), remove with a slotted spoon and transfer to paper towels. Season cracklings well with sea salt. Turn heat up a bit to medium-high, and place duck breasts in the center, fat side down. Do not fuss with the duck, as it will interrupt the searing. Season exposed sides well with salt & pepper. After 4-5 minutes, depending on the thickness, flip duck breasts over and allow to sear on the bottom side. After a minute or two, tilt pan slightly, and baste the top of the duck breasts with the pan oil. Remove duck breasts from pan after another 2-3 minutes and transfer to an oven friendly dish and place in a just warm oven.

Reduce heat to medium, and add pearl onions to oil (you may need to add a little more olive oil), cooking for two or so minutes- give the pan a couple of good shakes to keep the onions from sticking. Add in dried cherries and cook for an additional two minutes, or until cherries begin to plump and soften. Turn heat back up to medium high, and add in your port (if working on a gas stove, please be CAREFUL!). Scrape up any bits from the bottom of the pan and continue stirring over heat until sauce is reduced by about half, approximately 10-12 minutes. Once sauce has reduced and has a texture similar to maple syrup, turn heat to low and season with salt & pepper to taste.

Just before serving turn your oven’s broiler on to high, and briefly broil the fat side of your duck breasts (will help revive the crisp skin if sauce took a bit longer to reduce) for just a few minutes.

To Assemble:

In the center of each plate, spoon on a good sized serving of white grits. Top with chive oil. Slice duck breasts on the bias and fan out on top of grits. Spoon port reduction over duck slices and sprinkle cracklings over the whole lot. Serve immediately, and don’t feel guilty if you end up without leftovers.

Friday, February 4, 2011

Tomatoes and Garlic and Capers, Oh My!

Hi friends! I have been gone from the cooking and blogging realm for far too long (a fact I am painfully aware of!), but I am very excited to be jumping back in. For those that don’t already know, I have been hard at work on a new sort of baking project for the past few months- and it’s not a Sourdough starter... Yes, that’s right, I’m working on a baby!


Oh, hey baby!

Kyle and I were over the moon when we found out that we would be expecting our first child in July of this year, and had kept the news on the hush until we made it home to visit family and friends over the holiday season. Now that I am settling comfortably into my second trimester stride, my energy and appetite have both shot back up, and I am looking forward to getting back into the kitchen and working on some tasty ideas that have been bouncing around in my head!

With that news out of the way, let’s get down to the food. You'll have to be kind to me as I get back into the culinary groove, since I have been away for some time, and it usually takes me a little bit to get the creativity flowing again, so bear with me! After a couple of busy months of traveling, visiting friends and family, holidays and intermittent nausea battles, I was very excited to have a little quiet time at home last weekend. With all the traveling and being out of the apartment that we’ve done recently, the fresh produce was pretty much non-existent, so it took a few shopping trips/lists to get the kitchen up and running. For those that don’t live in the area, the weather has been terrible as of late, with weekly snow & ice storms that leave much to be desired, and have me craving warm & comforting food.

While out on one of my re-stocking adventures at the market, I spied veal cutlets on sale and quickly began throwing together ideas in my head. Roasted tomatoes and garlic scream comfort to me (see my opus to their awesomeness here), so I quickly put together a dish in my head that would be simple to make, and had leftovers that could be used again. I was super satisfied with the results, and found it to be equally comforting when used over the veal as well as when tossed with pasta. It’s not a wildly imaginative recipe, but it was a good first step back into cooking for me, and has already left me mulling over more new ideas in my head that should make their way here very soon.

My portions for the tomato “sauce” are for two servings, so if you’re like me and eating solo, you can save the 2nd half to be used for pasta later in the week. If you’re looking to have more leftover tomatoes or looking to feed a slightly larger crowd, you can easily double the amount called for.

Roasted Tomatoes, Garlic and Capers for Meat & Pasta

For Roasted Tomatoes:

- ½ pint organic grape tomatoes
- 5-6 cloves of garlic, skins intact
- ½ Spanish red onion, sliced thick
- 8 Large oil cured black olives
- 1 Tblspn of capers
- ¼ cup(ish) Good olive oil
- Sea salt & cracked pepper to taste
- 1 Tspn crushed red pepper (optional)
- 6 Fresh basil leaves, sliced thinly lengthwise

Preheat oven to 350 degrees. In an oven-proof pan or Dutch oven just large enough to hold ingredients, combine tomatoes, garlic, onion, olives and capers, and toss with olive oil until well coated. Season with salt, pepper and crushed red pepper. Place pan in oven for 53-50 minutes, or until tomatoes begin to pop, garlic has taken on rich caramel color, and onions have browned.

For Breaded Veal Cutlets (works well for chicken too!):

- Veal cutlets of medium thickness, pounded lightly (1 for each person, depending on size)
- ½ Cup all purpose flour, seasoned with salt & pepper
- 1 Large egg, beaten
- ½ Cup panko bread crumbs seasoned with salt, pepper & a little dried oregano
- 2-4 slices of fresh mozzarella
-Olive oil

Heat a non-stick frying pan over medium heat with a little olive oil to coat the bottom of the pan. Using the breading “assembly line” technique discussed here, dredge veal cutlets through flour, egg and panko, and place breaded cutlets directly into pre-heated pan (if cooking for more than 2 servings, do this in batches, as over-crowding your pan will cause an uneven distribution of heat, and cutlets will not brown as well). Cook cutlets 4-5 minutes per side, or a bit more depending on thickness, until cooked through and golden brown on the exterior. Remove fully cooked cutlets and place in an oven proof baking dish.

To Assemble:

When tomatoes have fully roasted, remove from oven, switch oven off and turn on broiler to high. Transfer tomato mixture to the same pan used for sautéing veal and lightly sauté tomatoes over medium heat (this will help break up the roasted tomatoes a bit, creating a more saucy texture). While sauce heats, top each cutlet with a few slices of fresh mozzarella, place under broiler and broil until cheese is brown and bubbly. Remove from oven and transfer to serving plate. Spoon tomato mixture over cutlets, and top with fresh basil. Serve with a simple green salad and a loaf of rustic bread for a hearty meal.

Using Leftover Sauce for Pasta:

Bring a pot of salted water to a boil over high heat. Drop in pasta & cook, following package directions. While pasta cooks, heat up leftover sauce in a small skillet, adding a little water, wine or chicken stock to loosen it up a bit. Once pasta has cooked, drop into skillet with sauce and toss to coat. Finish with a little grated or shredded parmesan and fresh basil. If you’ve got some leftover cooked off chicken breast, sausage, or really any protein, dice up and heat in with the sauce- it’s a great addition!

Monday, November 8, 2010

Rustic Lamb Lasagne

Whenever Kyle comes home from sea, I try to make something really comforting and homey to welcome him back from his time out to sea, especially now that we are into November and the mercury has taken a significant nose dive. As I’ve said many times before, I really enjoy fall and winter, and all of the hearty cooking that comes along with it. On the whole, Kyle is a very much a “meat & potatoes” kind of fella, although he has a very adventurous palate. This past cruise, his ship was researching off of Georges Bank, and this time of year up North can be quite biting.

I have been traveling almost every weekend for the past couple of weeks, and as a result my cooking & blogging have been somewhat lacking. However, the stars aligned for this past weekend, and with Kyle coming home for more than a night or two, I was excited to make something truly “from scratch” that would be filled with rustic flavors and soul warming substance.

I stumbled across Nigella Lawson’s recipe for Venetian Lasagne, and immediately felt inspired. I loved the idea of replacing noodle layers with polenta, and from her initial recipe, I began building my own take on it in my head over the next two days. With the much appreciated help of my friend and colleague, Matt, I began bouncing ideas off of him on how to expand on the polenta lasagne concept, which he and his wife had made a take on before. Nigella’s original recipe called for ground beef, and after playing around with different textural concepts, I settled on substituting a combination of ground sausage and diced lamb to create a more interesting consistency. From there, I decided upon adding a layer of ricotta with fresh herbs- a component I have to add to any baked Italian pasta dish. I upped my vegetable measurements as well to add to the robust nature of my concept.

I took a lot of pleasure in the entire slow-cook process of this dish- I bought my lamb as a bone-in leg section, and butchered it down myself to ensure absolute freshness and flavor. As the sauce simmered away on low heat (the smell was incredible!), I enjoyed a glass of wine, mixed up the ricotta layer and prepared my assembly line and enjoyed the warmth of my tiny kitchen on a blustery night. I cooked & assembled the lasagne a day in advance, and I would not recommend attempting this from start to finish on for a weeknight meal. It is a perfect “do ahead” recipe, as it will survive perfectly covered in a dish in the refrigerator for up to two days in advance or could be made the day of a weekend dinner party. It is hearty enough to chase away any cold fall or winter day, and elegant enough to serve at a casual dinner party with good friends and a hearty red wine. My recipe ended up being enough to make a grand 9”x13” pan for Kyle and I, and as a thank you to Matt, I sent him home after work on Friday with a 9” round pan of the same to share with his wife over the weekend- it was only fitting after being my soundboard on it over two days!

I have never been so happy with the way a lasagne has turned out from start to finish, and I will be making this again and again in the future. The lamb was robust and full of flavor from its slow simmer in the sauce, and the polenta absorbed the all of the flavor while still maintaining its own integrity. I served it alongside a chopped style Mediterranean salad (recipe up soon!), and the huge flavors of the lasagne complimented it perfectly. At the end of the weekend, Kyle and I were left with two measly end pieces, which we plan on devouring after work today. I have to say, the best compliment came from Matt and his wife, who texted the following message to me on Satuday: “I must say that the lasagne is superb! Nice work. Natascha and I totally owned the whole pan. Can’t feel my face.” It doesn’t get any better than that, as far as I’m concerned!

Rustic Polenta Lasagne with Lamb, Mushroom & Sausage Ragu (inspiration taken from Nigella Lawson’s Venetian Lasagne)

Written out in order of preparation:

For the Polenta:
-2 Cups instant or quick cooking polenta (I used Pastene)
- Chicken stock (enough for whatever the polenta instructions require for cooking liquid)
- ¾ Cup shredded Parmesan
- 1Tblspn. butter
-Sea salt & fresh cracked black pepper

For the Ragu:
- ½ lb. loose Italian sausage
- 1½ lbs. Fresh lamb leg, diced into bite size pieces
- 16oz. Baby Bella mushrooms, roughly diced
- ½ Vidalia onion, diced
-3-4 Medium garlic cloves, minced
- 3 Celery stalks (with green tops), diced
- 3 Carrots, peeled & diced
- 16oz. Can crushed tomatoes (San Marzano or Pastene are perfect)
- 2-3 Tblspn. tomato paste
- ½ Cup hearty red wine, such as Chianti, Merlot or Bordeaux
- 2 Bay leaves
- Olive oil
- Sea salt & fresh cracked black pepper

For the Ricotta Layer:
- 16oz. Part skim Ricotta cheese, at room temperature
- 1 Large egg
- Handful of flat leaf Italian parsley, chopped
- Heavy pinch of fresh ground nutmeg
-Sea salt & fresh cracked black pepper

Additional ingredient: 1+ Cup shredded Parmesan, for layering

For Polenta: In an adequately sized stock pot, heat chicken stock (amount determined by brand of polenta used) over medium high heat until boiling. Add in dry polenta and stir continually until stock is absorbed. Remove from heat & quickly stir in Parmesan cheese, butter and season with salt & pepper. Divide polenta between two cookie or baking sheets, using a spatula to spread out evenly (once polenta begins to cool slightly, it can be smoothed further by placing a layer of parchment paper on top and passing a rolling pin over the top). Set aside and allow to cool completely.

For Ragu: In a large pot or Dutch oven, heat 1 Tblspn of olive oil over medium heat, add in sausage meat and cook until browned, stirring to break up. Once browned, remove with a slotted spoon & reserve in a large dish. Add a little more olive oil & add in onions, celery and carrot. Season to taste with salt & pepper and sweat, stirring occasionally for 10-12 minutes, until vegetables are softened. Add in garlic & mushroom, cooking an additional 5 minutes until mushrooms have softened and garlic is fragrant, but not browned. Remove vegetables with a slotted spoon to same dish as sausage and reserve. Turn heat to medium-high, add a little more oil if needed, and sear off lamb pieces until well browned, approximately 7-10 minutes, seasoning with salt & pepper. After fully browning, add in sausage and vegetable mixture and stir well to incorporate. Reduce heat to medium-low, add in bay leaves, crushed tomatoes, tomato puree and wine and bring to low simmer. Stir well and cover partially with lid, dropping heat to low. Allow sauce to cook down over the 60-90 minutes, checking & stirring occasionally. If sauce becomes too thick, thin with a bit of stock or water, and if sauce does not reduce enough, add a bit more tomato paste. Once sauce has reached desired consistency, turn off heat, remove bay leaves and allow to cool slightly for assembly.

For Ricotta: Combine Ricotta, parsley, egg, nutmeg, salt & pepper in a bowl until well mixed.

To assemble Lasagne: Using your pan as a guide, cut cooled polenta to fit the bottom of pan (you should be able to get 3 full slices of polenta out of the pans for layering, and use the last ½ for a smaller [freezer?] lasagne), and place first layer into the bottom of pan. Spread a layer of ricotta on top using a spatula, and top with 1/3 of the Parmesan. Top with a layer of the ragu sauce. Repeat process for a second layer, topping with a final layer of polenta (3 layers of polenta total). Spread with remaining parmesan.

If serving immediately: cover lasagne with a layer of aluminum foil and bake off for 60 minutes in a 370 degree oven, or until bubbly and heated through. Remove foil and broil for 3-5 minutes, until cheese browns and becomes crunchy. Remove from oven & serve with simply dressed greens, lightly sautéed broccoli rabe or lemony haricot verts and a glass of your favorite red.

If making ahead of time: All assembly up to cooking can be done up to two days in advance, and lasagne can be stored in your refrigerator. Top tightly with a layer of plastic wrap, and cover with aluminum foil. Before baking, discard plastic wrap, and follow above directions, adding 20 minutes cooking time if going straight from refrigerator to oven.

Monday, October 25, 2010

Hungarian Mushroom Soup

My first taste of Hungarian Mushroom soup was back in college at the beloved Feasts of Reason in Chestertown, Maryland. Although it’s been years since I enjoyed a perfect roast beef sandwich on their fresh baked baguette with blue cheese mayonnaise (do I have your attention?) and a cup of their soup, my love affair with the soup continues.

I started working out a recipe for my own version of this soup years ago in my collegiate kitchen back on High Street, and it has maintained top billing in my mental rolodex. In the early stages, I would use condensed Golden Mushroom Soup as my base, and as my comfort in the kitchen grew, I traded in the soup base for fresh made roux to achieve the creamy base.

When Kyle and I were first living together, I remember mentioning having a craving for the soup one fall, and his eyes instantly lit up. Having lived in Hungary briefly years ago, Kyle has always been a big fan of the country’s flavors. It is a warm, comforting and creamy soup that will chase out the chill from any October evening. The ingredient list is relatively simple, and as such it’s great for feeding a large group without spending an exorbitant amount on the makings. If you’ve got it on hand, smoked paprika adds a wonderful depth of flavor, and a little Hot Hungarian paprika sprinkled on top before serving brings another element to the finished product. If you making the soup for a meatless crowd, a dark vegetable stock will work just as well as beef stock, just be sure to omit the Worcestershire

Paired with a loaf of crusty rustic bread, a spicy arugula salad and full bodied red and you’ve got the recipe for a perfect fall night in with friends. This recipe could easily serve 6 for a main course, and freezes well once cooled.

Hungarian Mushroom Soup

- 16 oz. Baby Bella mushrooms, cleaned and sliced
- 1 Medium Vidalia onion, quartered & sliced thinly
- 2 Garlic cloves, minced
- 40 oz. Good quality beef or dark vegetable stock (homemade is best)
- 1 Tbspn. olive oil
- 1 Stick salted butter
- ½ish Cup all purpose flour
- 8oz. Sour cream
- 8oz. Milk
- 4 Tbspn. dried dill
- 2 Tbspn. smoked paprika
- 1 Tbspn. regular paprika (if you don’t have smoked paprika, just substitute regular for both)
- Sea salt & fresh cracked pepper
- 1-2 Tbspns. Worcestershire sauce
- Chopped flat leaf parsely (optional)
- Hungarian hot paprika (optional)

In a small sauce pan, melt ¾ stick of butter over medium heat. Add in flour a little at a time and whisk to combine until a stiff roux consistency is reached. Continue cooking 5-10 minutes or until roux turns golden and flour is cooked down. Take off heat & set aside. Heat remaining butter and olive oil in the bottom of a large Dutch oven or soup pot over medium heat. Add in mushrooms and cook, stirring occasionally until mushrooms begin to release moisture, about 5-7 minutes. Add in sliced onions & cook an additional 5-7 minutes until onions become translucent. Add in minced garlic & cook 2-3 minutes until garlic is fragrant, but not browned. Season with salt & pepper to taste before adding dill and paprika, stirring well to incorporate and cook for an additional 2-3 minutes or until spices are well blended into vegetables. Once the mixture is well integrated, add in beef/vegetable stock and leave pot to come up to a low rolling boil. Once soup has reached a boil, mix roux into broth (see my note on a helpful technique at the bottom of this recipe), and continue mixing until a gravy- like texture is reached (you may not have to use all of the roux. Once all roux has diluted into the stock & the consistency is smooth, turn stove to low, add in milk & Worcestershire and mix well. Slowly add in sour cream until fully dissolved and texture is that of heavy cream-if too thick, add in a little more milk- and adjust salt & pepper seasoning as needed. Serve garnished with a little extra Hungarian hot paprika, chopped parsley or a dollop of sour cream.

Friday, October 8, 2010

Portuguese Kale Soup


In line with my recent ode to fall over on The Humble Home, I was really looking forward to making soup last Sunday. Due to circumstances unforeseen (ahem, having way too much fun hanging out with friends in Boston drinking margaritas & watching stand-up), it was pushed back to Monday, which worked out well since my beloved Patriots were on MNF, and I had plenty of time to prep my soup so I could enjoy it while watching the lads “Squish the Fish”- which they did a hell of a job with in the second half!

Soup is an all time favorite food, a tradition that started with my childhood and continues through today. Kyle and I are big soup fans, and it is a great way to stretch ingredients to get more bang for your buck. Traditionally, most of the soups that I make have pretty humble roots- fish chowders, Hungarian mushroom, beef barley, and the likes all started as ways to feed a crowd on the cheap with whatever was on hand. I’ve always enjoyed sampling the local foods when living in different parts of the country, and the local soups are usually a pretty good example of the flavors and culture of a region. Most of the recipes I’ve picked up along the way come from working in kitchens and restaurants- while working as a lunch chef in the Virgin Islands, I picked up a great recipe for Caribbean Black Bean soup, my chowder recipe stems from my days in the kitchen at The Chowder House, Maryland Cream of Crab came from friends on the Eastern Shore, and while serving at a sushi bar in Colorado, I picked up a fantastic recipe for Mexican Tortilla soup from the immigrant workers in the kitchen.

Living in Rhode Island, I’ve started to pick up on the flavors that dominate the area around here, primarily influenced by the Portuguese culture. While I concede to not having a lot of knowledge about Portugal and the culture, I am really digging their food! Fried calamari is served with banana pepper rings, seafood chowders gain a little spice and a lovely pink tone from chorizo and fresh meats are slow simmered in wine and spices. One item I keep seeing pop up on local menus is Portuguese Kale Soup. I’ve tried it at a couple of places, and the flavors are wonderful and comforting- stewed kale, soft potatoes and onions and a little kick from the spicy sausage- all the makings for an ideal fall soup.

I started my quest for an authentic kale soup recipe online and found a lot of variations, each with their appeals. Most of the reviews offered up variations, as with many cultural foods, everyone’s mother or grandmother has their own spin on the ingredients. Building off of one recipe that seemed to have the basics down, I asked a couple of the Portuguese guys I worked with for their take. Much like the online comments, each had their own spin. With recommendations and a basic recipe in hand, I stopped by the store, picked up the components and a loaf of take & bake bread and headed home to get to work.

The end result was a wonderfully satisfying soup that wasn’t overly heavy, but can keep you full all evening or afternoon. Up until recently, kale has been a relatively underutilized green, and I am happy to see it making a resurgence in the food blogging and restaurant communities. It holds up well to the slightly spicy nature of the sausage, and doesn’t fall apart even after a couple of days in the stock. I made a huge batch, but have halved it so as to be a little more manageable. This soup will most certainly be in heavy rotation on my list, and is a welcome departure for the standard chicken noodle as a quick go-to one pot dinner.


PORTUGUESE KALE SOUP (adapted from cooks.com)

- 1lb. Fresh kale, well washed, stems removed, torn into pieces
-1 Large Vidalia onion, Frenched or julienned
-4 Large red skinned potatoes, diced large
-1 lb. Linguica loose or diced if in links (Chorizo works well)
-6-8 Cups chicken or pork broth (more or less, depending on how “soupy” you want the finished product to be)
- 4 tblspns. Olive oil
-3 large garlic cloves, minced
-1 Can Cannelloni beans, rinsed & drained
-1-2 Bay leaves
-1 hot pepper, seeded (I used a good sized Fresno)
-1 tspn. Smoked paprika
-Sea salt & fresh cracked pepper

In a large soup or stock pot, heat olive oil over medium heat. Add in onions and linguica and cook, stirring occasional for 10 minutes or until onions turn translucent and sausage begins to breakdown. Add minced onion & continue to cook for an additional 5 minutes. Add in potatoes, hot pepper, bay leaves, paprika, a little salt & pepper, stir well to combine, continue cooking for another 10 or so minutes until potatoes soften slightly (see note). Add in broth and turn heat to medium-high, and continue cooking until at a low boil. Add in torn kale a handful at a time, stirring in to wilt. Once all kale has been incorporated, simmer additional 10 minutes. Add in Cannelloni beans, season with salt & pepper to taste, and simmer for 5 more minutes. Serve hot with crusty bread.

Note: A great trick I picked up from making industrial batches of chowder while working at The Chowder House- when building your soup base, allow potatoes, onions and other components to hang out together for a couple of minutes before introducing liquids. Doing this will coat your potatoes and onions with the spices being used (as well as the delicious flavored fat from the sausage), which in the long run will infuse the veggies with more flavor, and make for a more cohesive finished soup.

Tuesday, October 5, 2010

German Potato Salad

(yep, camera still out of comission- thanks again Crackberry)

Some days, you just need a little bacon grease.

On the whole, I pride myself on doing my best to eat well and keep my desire to indulge in check. I actually enjoy a good workout, run or long walk with Kyle. But some days you just have to tell the health nut on your shoulder to take a hike.

Due to the offshore effects of one of the recent tropical storms, Ky’s ship ended up back at the docks for a few days last week while they waited for a better weather window. I was happy to have a couple of extra days with him, as we are on the cusp of deciding where to request for his next assignment. It is a big deal not only for his career, but the future of mine as well (more to come on that later). It’s a pretty big topic to take on, deciding where you want to spend the next three years of your life, and such big choices need big, comforting flavors. Our go-to on a cold night has always been German food. Very early on in my kitchen adventures, I used to make a casserole similar to this dish, and the potato salad recipe has been evolving over the past 20 years or so as a result.

Growing up, Kyle spent many hours helping out at a close family friend’s restaurant in downtown Brunswick, Richard’s. Richard himself is from Germany, and his dishes are beyond comforting. While helping out, the boys were always given a bite to eat, which commonly came in the form of stewed red cabbage, since there were at least a couple of them underfoot, and cabbage was inexpensive. From this, Ky has a wonderful stewed red cabbage recipe that I absolutely love, and am still working on convincing him to write down so I can post it. It’s such a perfect cold night dish, and it only gets better if left to come together overnight.

When we lived in Annapolis, there was a wonderful German restaurant we would sneak away to down in Edgewater called The Old Stein Inn. The beers were cold, the food thoughtfully made, and if you caught it on a warm summer night, there would be a live accordion player strolling through the beer garden out back (and you would gladly shell out $10 for her CD after a couple of pints!). Through all of these various experiences with some of our favorite German haunts, we’ve thrown together our own little routine for our German night- both of us standing over our respective bubbling pots, sautéing onions, having a beer or two while we talk and cook, the whole apartment smelling like apple cider vinegar and bacon- pure heaven.

It goes without saying that this is probably not a menu that you would want to eat everyday while trying to be health-conscious. But that’s what makes it all the more special- a compilation of dishes that are not only delicious, but spark memories of past dining experiences, and bring a little comfort at exactly the time when you need it.

(Footnote: the discussion was awesome, we are a united front on our hopeful next destination, and updates soon to follow when we get confirmation!)

Hot German Potato Salad

-6-8 Large red skinned potatoes (I used Irish Reds), cleaned, halved and sliced into even ½ circles
- 4-5 Slices thick cut bacon, diced
- ¼ Sweet Vidalia onion, diced
- ¼ +/- Cup all purpose flour
- ¼ +/- Cup apple cider vinegar
- ¼ (ish) Cup water
- Sea salt & fresh cracked pepper
-Handful flat leaf parsley, chopped

In a large Dutch oven, heat salted water & cook potatoes until just fork tender, about 10-15 minutes, depending on thickness of slices. Drain in colander & set aside. Wipe out Dutch oven and heat over medium heat. Once to temp, add in diced bacon and cook, stirring frequently, until crisp. Remove with slotted spoon & drain on paper towels. Turn heat down to medium-low and add onions to bacon grease, cooking until translucent, about 10 minutes. Season onions lightly with salt & pepper. Add in enough flour to make a moderately thick roux (about the consistency of heavy cake batter), and continue cooking another 5-7 minutes, until flour has cooked out, turned golden brown and thickened a bit more. Add in cider vinegar a little at a time to loosen the roux, use a little more or less than called for, depending on consistency, and use water to thin to consistency of hollandaise sauce (overuse of vinegar can overpower the salad). Stir in potatoes, parsley & reserved bacon until potatoes are well coated. Serve while still warm. Salad can be made up to an hour or two in advance and be kept covered in a low set oven. Stir well before serving, and add bacon just before serving to keep crisp. This salad is best friends with a couple of good quality brauts, a little whole grain mustard, a pile of kraut and a pile of buttered spaetzle, and good friends should never be separated...

Tuesday, September 21, 2010

Modern Comfort Food

(Is it obvious yet that my actual camera finally gave up the ghost, so
I've been using my phone's camera for the past couple of weeks? Apologies!)

There’s nothing like a relaxing weekend with a close friend- unwinding, telling stories, window shopping and the occasional glass(es) of wine in the afternoon. The only thing that makes this better for me is when the close friend that is visiting happens to be my mother! We attended the Newport boat show (the initial excuse for the trip), walked around down town, drove out through Ocean Point to watch the surf, had a long brunch at Café Zelda and took time to breathe and enjoy hanging out as the dynamic mother-daughter duo we are. The weather was most certainly in our favor, and we did our best to appreciate as much of it as possible, including enjoying a waterside late lunch out on the patio of The Pier.

After tooling around downtown and the boat show on Saturday, I was chomping at the bit to cook dinner, as my mother is one of the biggest supporters of my culinary obsession, and one of the most honest taste-testers I know. I had an idea for a scallop dish that had been rolling around in my head for a week or two, and since Ky isn’t a huge scallop fan, Saturday presented itself as the ideal time to make the dish. I also invited my good friend Jill (who was my supervisor at IYRS during my volunteering) over, as she and my mother get along very well, and I was deep in debt to her for all of the kindness and comestibles she had recently extended my way.

After working over the concept of the dish a few days before, we trudged up to the treehouse with gorgeous scallops and bottles of wine in hand, I put out of a couple of pre-dinner treats, and set to work on the dish. The cooler temperatures and drop in humidity had me shooting for something warm and comforting, without being overly heavy. The scallops were fresh and beautiful, as has been the case with every fish purchase I've made at the oft-mentioned Anthony's Seafood, so I wanted to be sure to highlight as much of their naturally sweet and subtle flavors- anything too heavy, and their delicacy would be completely lost. Leeks and shitake mushrooms seemed like a natural compliment- both have the same understated flavors that would work harmoniously with the scallops. I have been looking for an excuse to work with cranberry beans again, and after volleying some concepts around in my head, I figured they would make a great base for the dish, and bring a little more depth without being overpowering. As our kitchen is small, and I didn’t want to spend the rest of the night washing dishes, I used one cast iron pan to do all of my searing & sautéing, and in the end this allowed for a great layering of flavors with minimal pan usage. I’ve also added a couple of technique notes at the bottom of the recipe from things I had picked up back in my days in real working kitchens, and they are tips that can help make a big difference in the ease and consistency of the dish.

The end result of all this planning was a comforting dish that had very light flavors, but was still very satisfying. The next time (and there certainly will be one) I make the dish, I plan on cutting down on the roux a bit, as the sauce was just a touch more heavy than I was aiming for, but the flavors were right on par with what I was aiming for. I served a simple green salad upgraded by fresh tomatoes and arugula from Jill’s garden as a side, and of course a little Prosecco- it was a Ladies’ Night, afterall! Good food, delicious wine, great friends and non-stop conversation, the makings for a truly great fall night in!

Scallop Casserole with Leeks, Shitake Mushrooms & Cranberry Beans
(this recipe will easily feed 4, and could be stretched to 5-6 servings)

- 1 ½ Lbs. fresh sea scallops
- 6 Slices Pancetta
- 2 Medium leeks, sliced thin & cleaned (see note)
- 6-8oz. Shitake mushrooms, stemmed & sliced
- 2 Garlic cloves, minced
- ¾ Stick good quality salted butter (Kerrygold Irish or some other European style works best)
- ½ Cup(ish) all purpose flour
- 24 oz. Roman beans, canned or fresh (if using fresh, cook off first)
- ½- ¾ Cup dry white wine (I used Sauvignon Blanc)
- Zest & juice of one good size lemon
- 8oz. Half & Half, cream or milk
- ¾ Cup Panko breadcrumbs
- Good handful of flat leaf Italian parsley, chopped
- Extra virgin olive oil
- ½ Tblspn. seafood seasoning (Old Bay is my go to)
-Sea salt & fresh cracked pepper

Remove scallops from packaging & place in one layer on a kitchen or paper towel lined plate, removing any “foot” muscles (tough white muscle the runs along the side of scallop) and discarding. Top with a second layer of towel and press down lightly to remove any excess moisture, which will cause splattering during searing. Heat a large cast iron skillet over medium high with a little olive oil. Fry pancetta slices until very crisp, being careful not to burn, and transfer to paper or kitchen towels to drain. Melt ½ stick of butter in a small sauce pan & combine with flour to create a roux, and cook for additional 5-10 minutes to cook out flour taste (roux should be a light golden brown), turn off heat & set aside. Add a little more olive oil to cast iron pan (there should be a thin layer coating the bottom), and bring up to medium-high temp. Remove top layer of towel from scallops & season exposed tops well with salt & pepper. Place scallops seasoning side down into hot pan and sear off, about 2-3 minutes. Season exposed side of scallops, and flip to sear other side, turning scallops in same pattern as they were introduced to heat (see note). Sear for another 2-3 minute and transfer to a warm plate & set aside.

Add a little more olive oil to pan and a little butter, bring to medium heat and add in leeks, stirring well to distribute. Cook over medium heat for 5-7 minutes, stirring occasionally. Add in sliced mushrooms & continue cooking another 5 minutes, or until leeks are well softened and mushrooms take on a deeper color. Add in minced garlic and cook an additional 2 minutes until garlic becomes aromatic. Season to taste with salt & pepper and seafood seasoning. Pour in lemon juice, ½ of the lemon zest and ½ cup of wine and heat until just below a simmer and slightly reduced, about 8-10 minutes. Begin introducing roux into mixture and continuing to stir well to avoid clump formation (see note). Continue to add roux until mixture becomes thick and gravy like- you may not use all of your roux, just use your best judgement. Using small amounts, begin incorporating half & half into the sauce, until correct consistency is reached- similar to that of alfredo sauce. Once consistency is reached, turn off heat. In a small bowl, combine breadcrumbs with remainder of lemon zest, and half of chopped parsley.

To assemble: Preheat oven to 350 degrees. In the bottom of a deep casserole dish (tall enough for ¼” lip above scallops & beans), layer cranberry beans in an even layer across entire bottom. Top with ½ of Leek-Mushroom sauce & place seared scallops on top in one layer. Cover scallops with second half of sauce and pancetta slices (either in whole slices or crumbled). Spread seasoned breadcrumbs evenly over top & bake off in oven for 20-25 minutes, until top is golden brown & sauce is bubbly. Serve immediately topped with chopped parsley & lemon slices. The casserole can also be made in individual ramekins or chafing dishes.

Notes

A note on leeks: Leeks are one of my favorite flavors to cook with- the problem being how to clean the little buggers without diluting the flavor! There are many philosophies on how to clean leeks, and mine has evolved from my brief kitchen training a few years back, and doesn’t call for any special equipment. Fill a deep bowl with very cold water. Slice off the last ¼ to ½” inch by the root & discard. Cut leek in half and slice thinly, about the width of a rubber band (there will be dirt in the layers- don’t panic!), and cut up until the leaves begin to turn dark green- these tops can be saved & used later for soup stock. Transfer sliced leeks to cold water and let sit for a minute or two. Lightly break apart slices with your fingers to help loosen any grit from in between the layers. Let the leeks sit, undisturbed, for another minute or two in water. Using a slotted spoon or your hands, gently remove leeks from water and place in a colander or strainer- be sure not disturb the water too much, as the sediment should have settled to the bottom of the bowl. Briefly rinse leeks with a sprayer and very cold water to remove any leftover grit. Shake to dry, and you’re ready to use!

A note on scallop searing: One of the best techniques for searing off scallops quickly & evenly came from my good friend and kitchen instructor, Ralph Smith. Once the pan has come up to temp, I place the scallops in concentric clockwise circles (evenly spaced) around the pan and then leave them untouched until I’m ready to turn and sear the other side. I use the circular pattern when turning them, so that every scallop gets the same time to sear, and you avoid overcooking- the pattern makes it easier to remember where you started in the pan as well. In some circumstances, it is a good idea to move the food around when searing, but with scallops it is imperative to let them sit once they are introduced to the heat- this is crucial for allowing the natural sugars to caramelize and achieving that lovely brown color. Scallops should only be moved once, while flipping sides, in order to sear properly.

A note on roux: While working as the lunch chef at The Chowder House, I learned an easy, foolproof way of introducing roux to liquid to avoid clumping, and have been using it ever since. For making roux, I use a bulbous metal whisk to combine & cook the flour-butter mixture so that the consistency remains smooth. After the roux has been well mixed, I cook it off for a couple of additional minutes so that any of the raw flour flavor is eliminated. When adding into liquid, I use the whisk to scoop the roux into the liquid, stirring with the whisk as soon as the roux is introduced to break up any clumps. Repeat this process with a small amount of roux until the desired consistency is released, and use the whisk yet again when adding in cream or milk to keep the sauce smooth.

Thursday, April 15, 2010

A Provencial Evening


A few weeks back, Kyle’s mom and stepfather came to visit our new digs for the first time while on their way down to New Jersey. It was awesome to finally be able to show them our little treehouse, and I was excited to cook them a family meal. Kyle’s stepfather Don had is recently on the backside of heart surgery, so and I wanted to take a classic dish I had done a few times before and give it a more healthy, heart friendly spin. I made a Coq Au Vin, which I had started the night before, and it turned out beautifully. Due to the way my memory works, I’m providing my standard instructions for the dish, but for a more heart-healthy version I used 50% boneless, skinless chicken breasts and 50% bone-in chicken thighs (trimming out all of the fat and leaving just a little skin on for flavor), reduced sodium/low fat chicken stock, whole wheat flour, natural sea salt, minimal olive oil, and a small amount of turkey bacon. Instead of serving it over buttered mashed potatoes (as I am usually inclined to do) or wide egg noodles, I served the chicken over yolk-free whole wheat noodles for an added boost of good grains. The noodles were a great accompaniment, and starting the Coq t he night before made all the difference in making a very rich dish that tasted more guilty than it was, and was enjoyed a by all.
This recipe has been drawn out of a couple of collaborators (namely Bon Appetite, The Silver Palate and my mother), and once again covers all of my bases for great entertaining: wonderful rustic flavors, easily made before hand and can be done all in one pot. I had good intentions of taking photos before we ate, but we were so wrapped up in catching up and having a great evening (not to mention enjoying a pitcher of my husband’s renowned Margaritas!), that I didn’t get around to it until the next day while enjoying leftovers, which I am happy to report were just as good the first time around!

Coq Au Vin

-1 4lb. Whole chicken, cut into 6-8 pieces, excess fat removed (leave some for flavor!)
-4-5 Slices of thick sliced bacon chopped (the fresh sliced found at most deli counters is best)
-20 Baby carrots, sliced in half, or 4 large carrots cut into similar sized pieces
-2 Cloves of garlic, minced
-1 Shallot, minced
- 1 ½ -2 cups pearl onion (see note on peeling technique below)
-12-14 Crimini mushrooms, wiped clean & quartered
-3/4- 1 cup good chicken stock
-1 Bottle French red wine (if you like your sauce a bit sweeter, you can also add in some Congac)
-1 ½ cups flour
-2 Bay leaves
-2-3 Sprigs fresh thyme
- ½ tblspn poultry seasoning
-Olive oil
-Fresh cracked pepper & sea salt
-Chopped fresh flat leaf parsley

As mentioned before, this dish is best when it is started the night before, so that the flavors can really come together. As an added bonus, you won’t be busy cooking the whole time guests are there- just simply re-heat and you are ready!

Heat a tablespoon of olive oil in the bottom of a large pot or Dutch oven (large enough to hold all ingredients) over medium heat. Once to temp, add in bacon and cook until crisp, stirring occasionally so as not to burn. While cooking bacon, toss flour into a large paper bag and season salt & pepper and poultry season, and shake to mix. Add in chicken pieces, close tightly and shake well to coat chicken. When bacon is cooked, remove from pot with a slotted spoon and drain on paper towel. Increase heat slightly to medium-high. Brown chicken in batches in reserved bacon fat/olive oil on each side for 5-6 minutes- be sure not to overcrowd pieces or proper browning won’t be achieved. Remove cooked pieces from the pot and set aside on a plate. Continue process until all chicken is cooked, and be careful to watch your temperature control- you don’t want to burn the exterior of the chicken, or the pieces of flour and fat in the bottom of the pan- that’s where a lot of the flavor for your sauce resides. You may have to mess with your temp settings a bit, depending on your range to maintain an even heat, as well as adding a bit more oil to keep chicken from sticking and burning- use your best judgment.

Return heat to medium, and add in mushrooms, carrots and onions. Sautee vegetables until they begin to soften, about 7 minutes. Add in garlic, shallots, bay leaves and thyme sprigs and continue cooking for 2-3 more minutes until the mixture becomes aromatic and season with salt & pepper. Sprinkle 1-2 tablespoons of flour over vegetables and stir to coat well, cooking for a few more minutes to cook out any “raw” flour flavor. Pour in 1/3 of the wine, increase heat a bit and stir to deglaze the bits from the bottom of the pan. Cook mixture for 10-15 minutes or so stirring occasionally until sauce begins to thicken a bit. Pre-heat oven to 350 degrees. Add in reserved chicken, bacon, and wine- stir to coat chicken. Add in chicken stock to your discretion to achieve a proper consistency (shouldn’t be as heavy as a gravy, but sauce should have some good body). Bring pot to a full boil, stirring for about 10 minutes. Cover pot and transfer to heated oven and let sit for as long as possible (I would recommend 1 ½ to 2 hours) to meld flavors. Remove from oven, let cool completely, check and adjust salt & pepper seasoning and transfer entire pot to refrigerator overnight. About an hour or two before serving, reheat either on stove top over medium heat or in 350 degree oven until heated all the way though. Once re-heated, the dish can stay in a low oven or on a low burner setting until ready to serve. Serve over simple mashed potatoes and garnish with fresh chopped parsley.

*A note on peeling pearl onions- Anyone who has been saddled with the chore of peeling pearl onions knows that it can be a royal pain, often resulting in eye strain, frustration and the assistance of a stiff martini. I don’t remember exactly where I picked up this tip, but it is the easiest way to get the little stinkers out of their jackets without resorting to the frozen bagged variety. In a tea kettle or pot, bring 4 cups of water to a rolling boil. While water is boiling, you can take the tops off of the onions if you wish, or leave them intact for later removal, and place onions in a heat proof dish and pour boiling water over. Let sit in water for about 1 minute. Drain onions quickly and plunge into an ice bath to shock. Once cooled, the onion skins should slide right off, and they will still retain their integrity, and you won’t be chasing tiny onion skins around your kitchen floor for days to come.

Chicken Thigh on FoodistaChicken Thigh